Parents can build a DIY sandbox with the following nine steps.
- Border the Location
- Cut the Wood
- Dig a Hole
- Lay the Base
- Add Benches
- Build a Cover
- Sand down Everything
- Apply Finishing
- Add Play Sand
Building a DIY sandbox for your child doesn’t require any special carpentry skills. You can build a sandbox with regular tools and available materials.
What You Need to Build a Sandbox with Cover
You will need materials and tools to create a DIY sandbox for your children. It helps if you take the measurements of the locations for your sandbox.
Taking measurements will help you determine the dimensions of your sandbox. Here’s what you’ll need.
Materials
- 10-15 2×4 pre-treated lumber
- Two 2×2 wood
- Screws/Nails
- Plywood
- Landscape fabric
- Play sand
- Rope
- Sander or Sandpaper
Tools
- Power saw
- Drill and drill bits
- Tape
- Marker
- Shovel
- Sander or sandpaper
- Level
You can get the necessary materials from your local hardware store or online. Also, you need to buy or borrow the necessary tools for creating.
It would be best to try and create a professional sandbox for your child.
How to Build a DIY Sandbox
Sandboxes are fun for kids, but they require a lot of work to build from scratch. However, building from scratch is an easy way to ensure that you are building something durable.
Parents can bond with their kids when making a sandbox.
Step 1: Border the Location
You can use four pieces of wood in a square form. Ensure the edges of the wood are touching each other, and you can nail them together.
The box will act as a rough framework for your sandbox. Also, use the dimensions of the bottom of the sandbox and the sides to determine the dimensions of lumber.
Step 2: Cut the Wood
First, you need to cut the wood into the desired pieces that are suitable pieces for the project. It would be best if you cut the lumber for benches and the sides of the sandbox.
Classify the wood according to the parts of the sandbox. It will be easier for you to identify the lumber you need when you separate it according to type.
You can do 3-4 rows of the sides, which will be about 12-16 lumber pieces for the sides. Also, you should set aside pieces for the benches and the backrests.
Overall, you need to label your stacks of wood after cutting them.
Step 3: Dig a Hole
Dig a home with a shovel where you are placing the sandbox. You need to dig about one foot deep to create space for the sandbox.
Try to create a square hole that will hold the sand when you’ve completed making the sandbox. Ensure that the bottom is even so that the final product has a flat surface.
You can choose to dig a deeper hole and add gravel to the bottom to ensure the water drains through the sand. However, you can skip the gravel option if your yard is well-drained.
It’s an extra step for precaution to ensure the bottom of the sandbox doesn’t rot.
Step 4: Lay the Base
There are two ways to create a base for a sandbox bottom to ensure that it is secure. You can opt to use a plywood bottom or a landscaping fabric at the bottom.
Either one is an excellent option as a sandbox bottom.
If you choose to use plywood as the base, here’s what you should do.
- It would help if you had ¾” plywood. It should cover the base of the hole you have.
- Nail the 2×2 lumber to the bottom side of the plywood to create a make-shift stand that will keep the base above the ground.
- Place the plywood at the bottom of the pit you’ve dug and lay the first layer of lumber for the sides.
- Nail the lumber to plywood to secure it. If it helps, you need to use bolts to hold everything together.
- You don’t have to drill holes on the plywood to drain water because you will place a cover at the top.
If you choose to use a landscaping fabric for the bottom, here is how to go about it.
- Start by placing two rows of the border lumber at the base. Anchor the bottom pieces to the ground to secure them.
- Lay the second layer of the border and nail it to the bottom layer.
- Lay the landscape fabric onto the bottom of the pit and drape it to the sides. Check the landscape fabric to ensure the corners are fitted well.
- Nail the fabric and widen the border before placing the next piece of lumber for the border.
- Continue stacking lumber on top of each other until you complete your border. Ensure that all wood is well attached.
- The last line of the sandbox should be above ground. It will prevent stuff from getting into the sandbox.
Step 5: Add Benches
Benches offer kids a place to relax after a few minutes while taking a break when playing. It’s simple to add benches because you only need to add a few pieces of lumber across the sandbox.
- Start on one end of the sandbox and add about 2-3 pieces of wood to create a bench.
- Repeat the procedure on the other side.
- You can ask your child to sit on the benches to see if it’s the right size.
- It’s optional to put a bench on both sides of the sandbox. It would be best to build one bench if several children will be playing in the sandbox.
Step 6: Build a Cover
A cover is an essential part of a sandbox to keep it clean and keep animals away. Uncovered sandboxes attract wild animals and pets to use them as a litter bin.
Also, sharp objects like branches and stones can get into the sandbox and hurt your child. You can build a simple but effective cover using plywood.
- Start by measuring the dimensions of the opening after adding the benches.
- Transfer your dimensions onto the plywood and cut it.
- Drill two holes on opposite ends to add rope handles.
- Cut two pieces of rope.
- Take one rope, pass a small bit through one hole and tie a knot to keep it in place. Repeat the process on the corresponding hole and adjust the size of the handle before knotting the rope.
- Repeat the step above on the other side.
- Test the handles to see if it’s comfortable to lift the cover.
- Place the cover on your sandbox to see if it fits.
- Make any necessary adjustments to ensure that the cover fits properly.
Step 7: Sand down Everything
You need to sand down all the wooden parts that will come into contact with your child’s skin. Sanding downs the DIY sandbox ensures that there aren’t any splinters or rough edges that will hurt your child.
Therefore, be thorough when smoothening the wood and edges. Run your hand over your final product to feel if there are any rough spots.
Step 8: Apply Finishing
You will need to apply a protective finishing layer to your wood to protect it. You can buy spray finish for easier application to your DIY sandbox.
Also, please read the product label before purchase to ensure that it is toxic-free and child-friendly.
- Start on the inside of the sandbox and work to the top.
- Apply one layer at a time and let it dry.
- Repeat the process for 2-3 layers of wood finish.
- You can apply the finish separately to the cover.
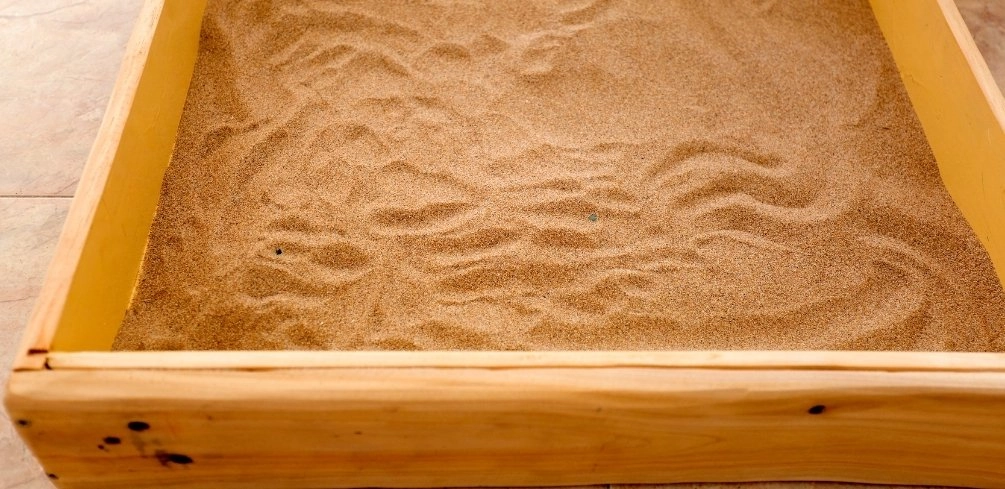
Step 9: Add Play Sand
Adding play sand to the sandbox is the final step before allowing kids to go in and play. You may need a couple of 50-pound bags of play sand [Amazon Link] for the sandbox.
Don’t fill the sandbox with sand to the very top.
Ensure the level of the sand is a couple of inches from the top to ensure it doesn’t spill when kids are playing. Use a rake to level the sand before letting kids jump into the sandbox to play.
Also, keep an extra bag of play sand in your home because you never know when you may need it.
How Long Will It Take to Build the Sandbox?
You should set aside at least 4-6 hours when building a sandbox if you have basic handyman skills. Otherwise, set aside one Saturday to build a DIY sandbox for your child.
You have nothing to worry about because most of the work involves joining two pieces of lumber together. Parents can ask their friends and relatives to help build a sandbox in one afternoon.
Overall, it’s not hard or complex work to build a sandbox in your backyard.
What Wood is The Best to Build a Sandbox?
The best wood for an outdoor playset is cedar because it is resistant to bugs and harsh weather conditions. Another excellent alternative is pine, but it needs to be treated to last for long. You can also choose Fir if you don’t have access to cedar or pine wood.
Overall, your geographical location will determine which kind of wood is readily available for you. If you can get cedarwood, don’t hesitate to buy it because you will be grateful in the long run for the service you get out of it.
Keep in if you go cheaper on the wood it will require more maintenance over time.
Selecting a Suitable Location for the Sandbox
Parents need to choose a suitable location for a sandbox to ensure it is clean and safe for children to use. Your children will spend a lot of their time in the sandbox once you put it in because it is highly engaging.
Therefore, you need to consider several factors when selecting an ideal location for your sandbox.
Visibility: A sandbox should be somewhere where parents can keep a close eye on kids with ease. Therefore, it should be at the location that is most visible in your backyard.
It can be tempting to place a sandbox at the edge of the compound to keep everything neat. However, it would be best if you tried installing it close to the house’s back porch.
Drainage: Select a location that is high on your property if you live on a slope. Alternatively, install a drainage system around the sandbox to draw water away during rainy seasons.
Water retention can damage the base and borders of the sandbox over time.
Obstructions: Don’t install your sandbox near bushes, low branches, or too close to the fence. Small kids don’t have the best motor skills, and they fall over a bush that is close to the sandbox with ease.
Ensure there are at least 2 feet of clear space surrounding your new sandbox.
Is It Cost-Friendly to Build a Sandbox?
Yes. It is more cost-efficient to build a DIY sandbox than to purchase one. Most sandboxes are a bit expensive, and the affordable ones deteriorate fast.
You can check out some sandbox designs online and write down the dimensions to replicate the design.
Moreover, you can ask for discounts for the material or wait for a sale to purchase them. Overall, the cost of building a sandbox will be lower than that of buying.
Additionally, you can build a better and high-quality sandbox for the same price as the one you covet to buy.
Building a DIY sandbox is better because you buy high-quality materials, and you don’t need professional skills to do it. In the end, it will be your choice whether you have the time to build a piece of playground equipment or buy one.
Are There Other Modifications for a Sandbox?
Most parents are comfortable with a sandbox that has benches and a cover. However, it is understandable if you want something fancier.
Here are a few accessories you can add to build a premium version sandbox.
- A canopy
- Bench backrests
- Storage boxes
You can add a canopy over the sandbox to shield your child from the hot sun. Moreover, you can create a storage area where kids keep their toys and knick-knacks after playing.
The modifications are a bit complicated but doable.
How Frequent are Repairs on a Handmade Sandbox?
Sandboxes are easy to maintain, and they don’t require regular repairs. However, you will likely replace the play sand a couple of times before you have to do any repairs to your sandbox structure.
You can do inspections monthly to identify areas that need repairs.
Are DIY Sandboxes Safe?
Sandboxes are safe as long as parents take proper care and maintenance of them. It would be best if you created a care routine to keep the area clean and germ-free.
For example, rake the sand frequently to let fresh air into the sandbox. Airing the sand prevents moisture accumulation, smells, and bacteria from breeding in it.
Also, teach children hygiene protocols when using a sandbox. Instill in kids the habit of washing their hands whenever they leave a sandbox.
Overall, it would help if you were vigilant about cleaning and disinfecting the sandbox. Make sure you find the right kind of play sand as that will be important in keeping the sandbox safe for your kids.
I personally recommend using kinetic sand but there are multiple types of sand to choose from.
Conclusion
A DIY sandbox project can be a family affair where you get to spend time with your kids. There is no doubt that a sandbox will keep your toddler engaged and entertained for many hours.
Also, it’s a cost-effective way to install a piece of high-quality playground equipment in your backyard. Moreover, it would help if you read about Sandbox Safety on my blog to care for a sandbox properly.
It’s really important to have a cover on your sandbox, it will keep bugs and even cats away from the sandbox.
You can switch a few things up to modify the design to suit your preference and budget without compromising the integrity of the toy. Best of luck as you build your little one a new toy.
Please be careful and use at your own risk
None of the authors, contributors, administrators, or anyone else connected with BestPlaygroundSets, in any way whatsoever, can be responsible for your use of the information contained in or linked from these web pages.


