Do you want to bring a little bit of the outdoors into your backyard? A sandbox with a bench is an easy, fun way to do just that!
It’s the perfect spot for kids to get creative, explore, and play. Plus, it adds a unique aesthetic touch to any outdoor space. Making your own sandbox with a bench isn’t as intimidating as it seems – I’ll show you exactly how to do it.
With the right supplies, building a sandbox with a bench can be done in no time at all. The best part is that you don’t need a lot of special tools or construction knowledge. With some basic DIY skills and a few hours of time, you can have your very own safe sandbox ready for playtime before you know it!
Let me walk you through the steps so that you can build a safe and secure sandbox with a bench that will give your kids years of fun and adventure. You’ll be surprised at how quickly this project comes together – so why wait? Get started on building your family’s new outdoor oasis today!
Materials Needed
Building a sandbox with a bench is like putting together a puzzle. It requires careful planning and the right materials to make it work. When gathering the necessary supplies for your sandbox project, you need to think about what kind of wood boards, screws, saws, and other sandbox materials you’ll need. With the proper supplies, you can create a safe and secure area for children to play in.
When selecting the wood boards for your project, make sure that they are of the highest quality. You want them to be sturdy enough so that they won’t break easily when in use but also lightweight enough so that they don’t become too heavy when filled with sand. If you’re not sure which type of wood board is best suited for this job, it’s recommended that you consult with an expert. I like using cedar wood.
You’ll also need to pick up some sandbox supplies, such as nails and screws, to secure the wood boards together. Make sure that these are strong enough to hold up against weathering and wear and tear over time, as well as to be able to carry the weight of any additional items like benches or decorations that might be added later on.
With all these considerations taken into account, you should have everything you need for your sandbox project!
Preparing The Area
Now that you know the materials needed, let’s move on to preparing the area. The first step is to prepare the ground. Clear away any debris and make sure the surface is level. Measure the area where you plan to build your sandbox and mark off a square or rectangle with stakes and twine so you can start laying out your frame.
Once you’ve marked off the area, begin digging out a hole that goes down at least 6 inches deep. This will help keep your sand in place when it comes time to fill it up. You may need to use a shovel or even a pickaxe, depending on how hard the soil is. When you’re done, make sure that your edges are all even and level before moving on to the next step.
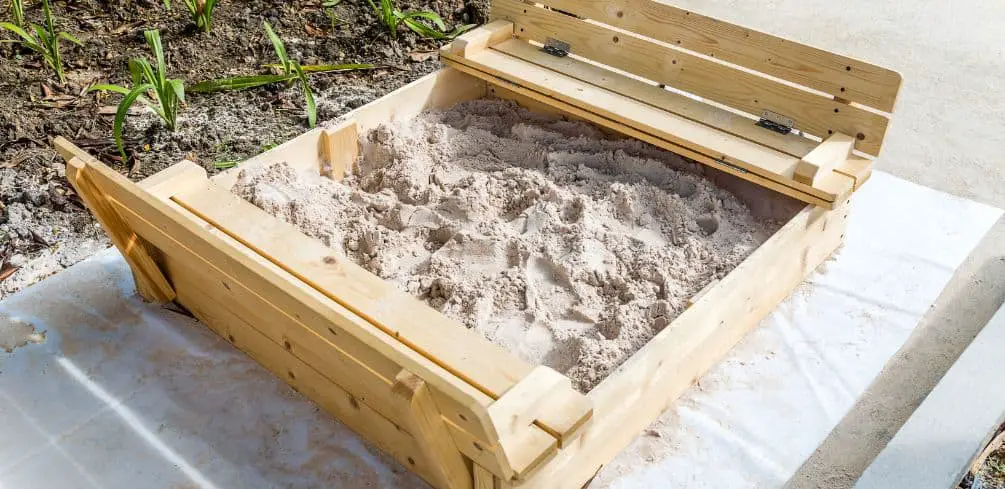
Next, line the bottom of your sandbox with landscaping fabric or plastic sheeting. This will help keep weeds from growing up through your sand and will also help hold in moisture, making sure that your sand stays nice and soft for kids playing in it. Lastly, add several inches of playground-grade sand and spread it evenly over the entire surface of your sandbox. Your sandbox with bench is now ready for use!
Building The Sandbox
Building a sandbox is easy! It’s the perfect way to get kids outside and away from the screens. Plus, it doesn’t require any special construction skills or tools. All you need are some basic building materials, and you’re ready to start constructing your sandbox.
First off, it’s important to have the right tools for the job. Luckily, these aren’t expensive tools – a few hand-held power tools like drills, saws, and hammers will do just fine. You’ll also want to make sure you have enough sand for your sandbox project. Decide how much sand you need based on the size of your sandbox area, and then purchase accordingly.
Next up is selecting the right type of material for your sandbox construction. Wood is usually a popular choice, but other materials like plastic or metal can be used as well.
Just make sure that whatever material you choose is weather-resistant so that it won’t rot or rust easily over time. Also, consider safety when making this selection – rounded edges are recommended for children’s play areas in order to minimize any potential accidents or injuries.
Once you’ve gathered all of your necessary materials and supplies, it’s time to begin building your sandbox according to your plans (or those provided online). Follow instructions carefully in order to ensure accuracy and precision during the assembly process. Additionally, pay attention to details such as making sure that all screws are securely tightened and that no sharp objects are exposed to the finished product. With these tips in mind, you’ll be able to create a safe and enjoyable sandbox for everyone in no time!
Adding A Bench
Now that you’ve got your sandbox built and ready to go, why not add a bench to give it an extra special touch? Building a bench for your sandbox is actually quite simple and can be done with just a few tools.
When planning the design of your bench, you want to make sure it’s wide enough to fit two or three kids comfortably. You also want to make sure it’s tall enough so they won’t have to stoop too much when they’re sitting on it. The best material to use for constructing the bench is treated lumber, as it will be able to withstand any weather conditions.
Once you’ve chosen the design of your sandbox bench, start by assembling the frame first. You’ll need four pieces of wood for this step – two for each side of the frame. Make sure these are cut correctly according to your plans.
Then attach the legs and seat support beams using screws and drill holes in them at regular intervals. Finally, attach the seat boards in place with nails or screws and sand down any rough edges before finishing off with paint or varnish.
Your sandbox now has a comfortable place for kids to sit while playing in their new sandpit! With just some basic tools and materials, you can quickly build a great addition that will provide hours of fun and relaxation for all who use it.
Finishing Touches
We all have a subconscious desire to be safe, so it is important to think about the safety features of your sandbox with a bench when decorating it and making it look beautiful. Adding ground coverings such as sand or pea gravel can provide a soft surface for kids to play on and reduce the risk of them getting injured.
You can also add landscaping ideas around the edges of the sandbox, such as shrubs, trees, or flowers for decoration.
When adding custom designs to your sandbox with a bench, you may want to consider accessories like built-in benches or lids that can keep out animals or debris. You could even include a roof over the sandbox so that kids can still play in the rain! Be sure to research any items you plan on using in your sandbox to make sure they are safe and non-toxic.
Your children will love their new sandbox with a bench if you take the time to add those special finishing touches. Whether you go for something simple or more elaborate, there are plenty of options available to help make your project unique and enjoyable. With some creativity and planning, you’ll have a safe and fun area for your kids to play in no time at all!
Conclusion
Building a sandbox with a bench can be an enjoyable project for the whole family. It’s an easy and rewarding way to spend some time together outdoors and create something that will provide hours of fun for your children. Plus, it’s a great opportunity to practice your DIY skills and take pride in your workmanship.
The materials are relatively cheap and easy to find, and you’ll be surprised by how quickly you can build this project from start to finish. With just a few basic tools, some wood, sand, and paint, you can craft this unique play area for your kids. Watching them explore their new sandbox with excitement will make all the hard work worthwhile.
This is a great chance to get creative and have some fun in the sun! Don’t forget to take pictures of your finished project so you can look back on it fondly in years to come. Plus, you’ll have a beautiful reminder of the special memories made while building it together as a family.
Please be careful and use at your own risk
None of the authors, contributors, administrators, or anyone else connected with BestPlaygroundSets, in any way whatsoever, can be responsible for your use of the information contained in or linked from these web pages.


