It takes a few steps to build a sturdy and durable wooden slide for your kids. You can make a DIY slide with the following steps.
- Cut the Wood
- Build a Tower
- Platform, Ladder, and Rails
- Tower Installation
- Install the Slide
- Add a Sandpit
- Finishing Touches
Kids love playing on slides, and they can spend hours in it. Building a slide for your kids can be a bonding event as your little ones ‘help’ you make them a new playground toy.
Moreover, your children will understand that you care about them and want to give them something fun. This article will provide you with all the details for building a DIY wooden slide.
What is a Slide?
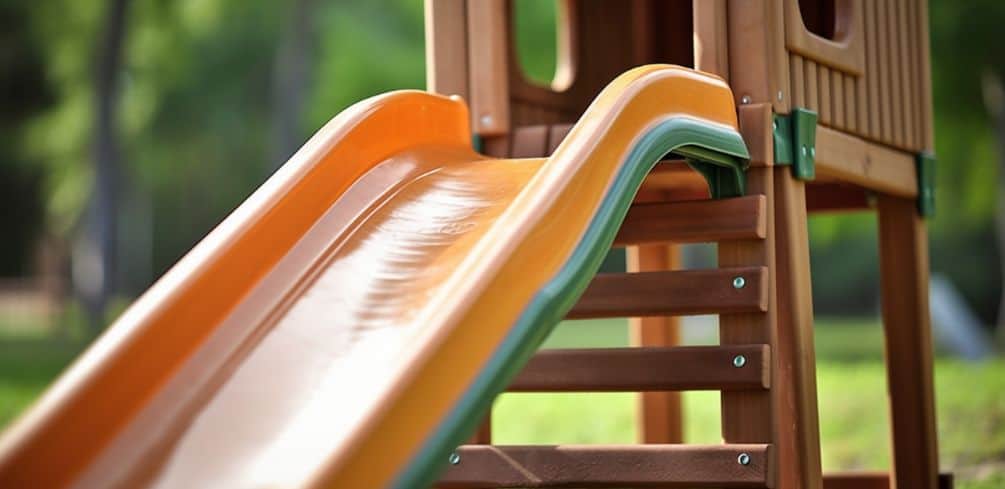
A slide is a smooth slope with a ladder on one end. Slides are standard on playgrounds, and they are entertaining for children.
Typically, slides are made of plastic or metal by different playground equipment companies. You can make a DIY slide using wood in your backyard for your child.
Most parents opt to build than buy a slide because of the cost. Once you think of a slide as a slope with a ladder, it seems easier to construct a slide for your child.
What Do You Need for the Project?
You can find most materials and equipment for a wooden slide at your local hardware store. Our comprehensive list of items will help you identify what you have and what you need to purchase to move forward with the project.
Here is what you need.
Tools
- Drill
- Power saw
- Hole digger
- Shovel
- Sander or sandpaper
- Level
Materials
- Four 3×4 posts
- Plywood
- Four 2×4 posts
- Two 1×4 posts
- Glue
- Finishing
- Box screws
- Concrete
- Play sand
You can get all the items online or at your local store at an affordable price. It would be best if you prepared measurements for your slide in advance to make the construction easy.
Most slides for toddlers and preteens are about 3-4 feet tall. The slope of the slide will depend on the space you have in your backyard.
How to Build a Wooden Slide

You need to follow several steps to build a DIY slide in your backyard with wood. It will take about 1-2 days to build and install a wooden slide in your backyard.
The beauty of building a wooden slide is that you can do all activities on-site.
Step 1: Cut the Wood
You need to cut the wood using a power saw to sizes that are useful in construction. There are many pieces that you need to cut up and tag for easy identification. Here’s how to go about it.
- Start with the four 3×4 posts for the platform. Measure 3-4 feet as the height of the platform. Then add 3 feet that will go in the ground during installation. Also, leave about one foot for the railing on the sides of the platform. Overall, you should keep your platform posts at 7-8 feet.
- Cut the 2×4 posts to size on the distance between each platform post. It will go around the four pillars to keep the platform square sturdy and the rest at the platform’s top.
- Cut the one 1×4 post to act as climbing ladder steps. The remaining 2×4 posts will be the sides of your slide.
- Cut the second 1×4 post into 1.5 feet pieces that will be the spooks of the platform railing.
- Cut the plywood the size of your slide if it is broader than that.
- Keep each pile separate for easy identification. You can choose to label the stacks so that you don’t pick wood from the wrong pile.
Step 2: Build a Tower
The platform for your slide will take most of the construction time. You can opt to build the platform in the garage and then install it in your backyard.
Constructing the platform on the ground makes it easy to maneuver around it and get everything right.
- Place two 3×4 posts about 1-1.5 feet apart and use a 2×4 piece to join the two posts. Use four screws per joint to ensure everything is sturdy.
- Repeat the process with the remaining posts until you have a tower.
- Repeat the process midway between the platform and the ground live to support the structure.
- Place the stand upright and shake it to see whether it is sturdy. A sturdy tower will move as one structure. You can notice loose parts swinging in different directions. Add screws were necessary to strengthen the tower.
Step 3: Platform, Ladder, and Rails
You need to create a platform at the top of the tower where your little one lands after climbing the ladder. Additionally, you need to add rails on the sides of the platform for the safety of your little one.
- Use the 2×4 pieces of wood and lay them at the top part of the tower. Place the planks with a tiny space in between to accommodate wood expansion due to high humidity.
- Use 2-3 screws on each side of the wood planks to attach them to the top of the tower.
- Add a plank on each side at the top of the tower for the rails.
- Attach the 1×4 spooks on the side of the rail to prevent children’s feet from going through space.
- Double-check your work to ensure that the platform and rails are sturdy.
- Use the remaining 1×4 or 2×4 pieces to create a ladder at the back of the tower. Keep the steps close if you have toddlers.
Step 4: Tower Installation
By now, the challenging part of building a wooden slide is complete. You can install the tower in your backyard and take a break, and the cement cures.
It is essential to let the concrete cure undisturbed so that the tower will be secure.
- Start by digging four holes for the posts in the dimensions of your tower.
- The holes need to be at least 3ft deep and 3×4 inches wide.
- Pour some gravel at the bottom of the holes to ensure good water drainage.
- Mix concrete and pour it halfway into the holes.
- Place the posts of the tower into their respective holes.
- Use a level to ensure the tower is straight before leaving the cement to cure.
- Wait for four hours for the cement to cure before attaching the slide to the tower.
- Fill the holes with dirt after the cement cures.
You should select the location of the slide with care. It should be a well-drained area at least 2ft away from the fence or any structure.
Also, there shouldn’t be low branches or electric cables near the slide. You will have to flatten the installation area if you have a slope in your backyard.
Step 5: Install the Slide
You can install the wooden slide on the tower once the cement cures. Keep in mind that the slide should be a soft slope. Steep slopes provide high sliding speeds that can lead to injuries when kids land at the bottom.
Therefore, you should ensure that the angle of the slide is low.
You can test the proper angle for your DIY slide using a toy car. Position the plywood on the tower at an angle and slide the toy car to see how fast it goes down.
Repeat the process until you find the angle that lets the toy car slide down at a low speed. Mark the location on the ground for reference when installing the slide.
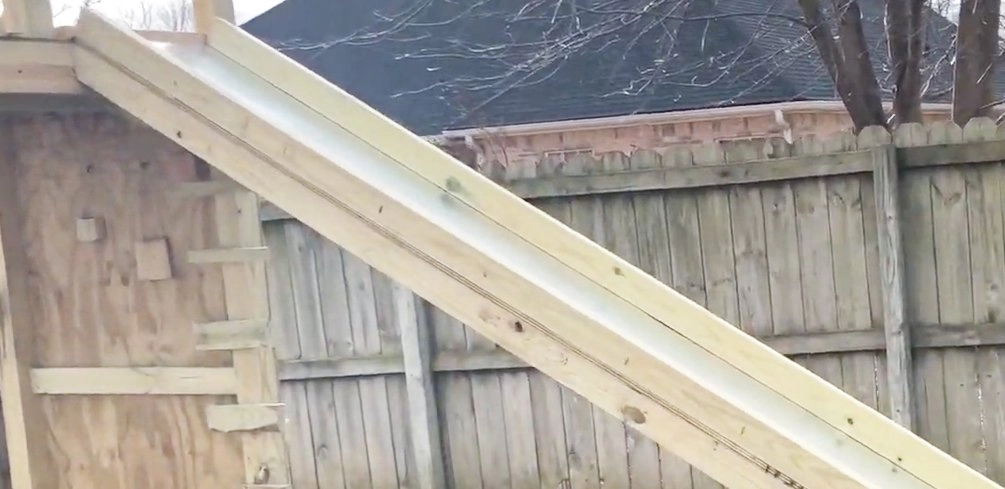
- Start by cutting the plywood to the length suitable for your slide.
- Cut a small square piece for the bottom part of the slide.
- Place the plywood with one end on the platform and the other on the ground at the desired angle.
- Use screws to attach the plywood to the platform.
- You can use stakes to anchor the plywood at the bottom of the slide.
- Use the remaining 2×4 timber and attach them to the sides of the slide. Use screws to connect the sides to the platform and at the bottom of the slide.
- Try adding a small piece of plywood as a landing area.
- Check your work to see if the slide is attractive. Use your toy car to see how well the slide works.
After the slide is attached and working you can even increase how slippery the slide is.
Step 6: Add a Sandpit
Add a sandpit at the bottom of the slide. A sandpit is fun, and it will break the fall when your child exits the slide. Alternatively, you can use a tarp at the bottom to keep your little ones safe.
- Dig a shallow square hole at the end of your slide.
- Add play sand to the pit until it is a few inches from the top of the pit.
- Rake the sand to ensure it is evenly distributed.
Here are some extra sandpit safety tips.
Step 7: Finishing Touches
Sand down the entire structure with a sander or sandpaper until it is smooth to the touch. Pay special attention to the corners of the frame.
Do the skin test to ensure you’ve achieved the right level of smoothness. Rub your arm over the structure to see splinters or rough parts that scratch your skin.
Apply a child-friendly protective coat to the wood. Ideally, choose a spray finish because it is easy to apply. Apply several coats on the tower and sides of the slide. Let each coat dry before applying a second coat.
You need to apply about 3-4 layers on the slide so that kids go down with ease.
DIY Pool Slide
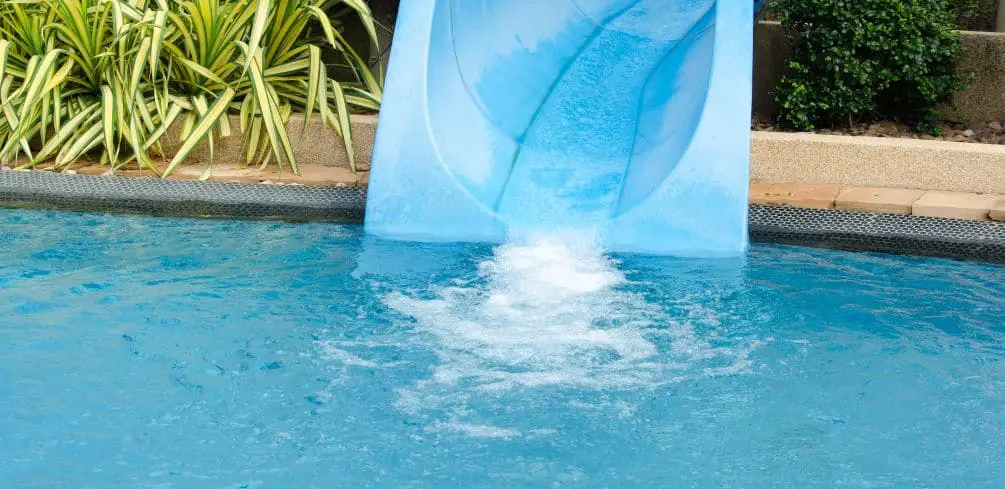
Pool slides are more fun than regular tools, and you can use the steps above to create a wooden pool slide after a few modifications. You can build a fun pool slide for your kids and feel good about being an excellent parent.
Pool slides need water to keep the slide moist, and they need to be at the edge of the pool. Therefore, you need to fit the DIY slide with a water source and ensure that it sits at the ideal location for a child to land in the middle of the pool.
Post Installation
The installation process is similar to that of a regular wooden slide. However, the edge of the slide will have to hover over the pool a bit. Also, you will need additional posts at the edge of the pool to hold the lower end of the slide.
- Dig four holes for the slide at the location the ladder will be.
- Dig two holes at the edge of the swimming pool where the bottom of the slide will be.
- The poles at the edge of the pool should be about a foot from the ground. The purpose is to ensure kids land in the pool with a splash.
- Add gravel at the bottom of the holes, then fill them with concrete halfway.
- Add the posts to the concrete. Use a level to ensure everything is straight, and let the concrete cure.
Cover any remaining spaces in the holes with dirt and clean up any other debris after the installation.
Slide Installation
Installing the slide is similar to the procedure above. You should measure the idea angle with a plastic toy car and cut the bottom posts to size.
Install the slide and the sides to keep kids safe. After that, you should secure the wooden slide with the following procedures to prevent water damage.
- Add a tarp on the slide and use glue to keep it in place. Use a heavy-duty tarp if you can afford one.
- Cover the bottom part of the slide and the sides with the tarp.
- You will need another tarp to throw over the slide when it’s in use. You can anchor the top tart on the posts when kids are using the pool slide.
Another aspect of installing a pool slide includes adding a sprinkler pipe at the top of the slide. The tube will keep the top tarp wet enough for kids to slide down.
You can modify a standard pipe by drilling small holes and closing off one side. The other open side will be the attachment area for your garden hose.
Testing
Test the viability of the water slide with a plastic toy car and watch where it lands in the pool. You want your children to land in the middle of the pool.
Testing the pool slide is essential because you may have moved it a little when doing the installation.
What Type of Wood is the Best?

The best wood for a DIY wooden slide is pine or cedar. Cedarwood produces durable lumber that is rot and bug resistant.
It can withstand all weather conditions without breaking or major damage. Pine is a suitable alternative when you are building an outdoor DIY slide.
Overall, the kind of wood you find near you will depend on your geographical location. Some parents will have access to pine at affordable prices, while others will have access to cedar.
Either of the two types of timber is excellent for building a wooden slide.
How Long Can The Slide Last?
The durability of a DIY slide depends on the quality of the materials, the builder’s skill, and slide maintenance. Your slide should last for 4-7 years with proper care without needing significant repairs.
Therefore, don’t buy low-quality materials for the DIY slide. Moreover, keep the slide in mint condition by controlling the wood protected from weather elements.
Why Should You Do a DIY Slide?
Overall, a DIY wooden slide can cost $200-$400 for materials if you have the necessary tools. It will cost less than if you have leftover lumber lying around your home.
Generally, DIY wooden slides are cheaper than ready-made ones. Additionally, you can build one in a day if you have basic carpentry skills.
Moreover, a wooden slide will add to the curb appeal of your home. It is a valuable and cost-effective way to improve how your backyard looks. You can spend weekends in seats in your backyard watching your kids play.
Care Tips for Wooden Slides
- Cover the wooden slide during rainy and cold seasons to keep the wood dry.
- Ensure the playground is well-drained to prevent the wood from rotting due to water damage.
- Clean the sandpit regularly and keep it covered with a fine chicken mesh when kids aren’t using the slide.
- Carry out monthly inspections on the wooden slide, looking for bugs, splinters, broken wood, or where the protective coat came off. Inspecting the slide will enable you to do minor repairs whenever they arise and keep it in mint condition.
- Don’t allow kids to carry food or juice boxes when they are sliding.
- Teach your kids the proper way to use the slide to prevent damage by the kids and minimize the occurrence of injuries.
Conclusion
Building a wooden swing for your child from scratch is possible. You can make fun playground equipment for your child in one weekend.
The parent will have to be organized when building the platform because there are many wood pieces. Label your piles if you are the forgetful type for easy identification.
Overall, you can build a wooden slide if you have basic carpentry skills. The most tiresome part is cutting the wood to suitable sizes and building a tower with a sturdy platform.
You can ask for help from your friends and relatives to complete the slide in a few hours. Best of luck with the new project. Once it’s all completed you can even paint the slide to give it some more flair.
Please be careful and use at your own risk
None of the authors, contributors, administrators, or anyone else connected with BestPlaygroundSets, in any way whatsoever, can be responsible for your use of the information contained in or linked from these web pages.


