Steps to make a homemade water slide:
- Plan ahead
- Construct the water slide frame/support
- Move your support to the edge of the swimming pool
- Attach support frame and slide together
- Check to confirm the slide is positioned securely
- Secure the slide
- Test to check if you need more support
- Spray the pool slide
- Add grip tape for safety
- Test your pool slide again and have fun
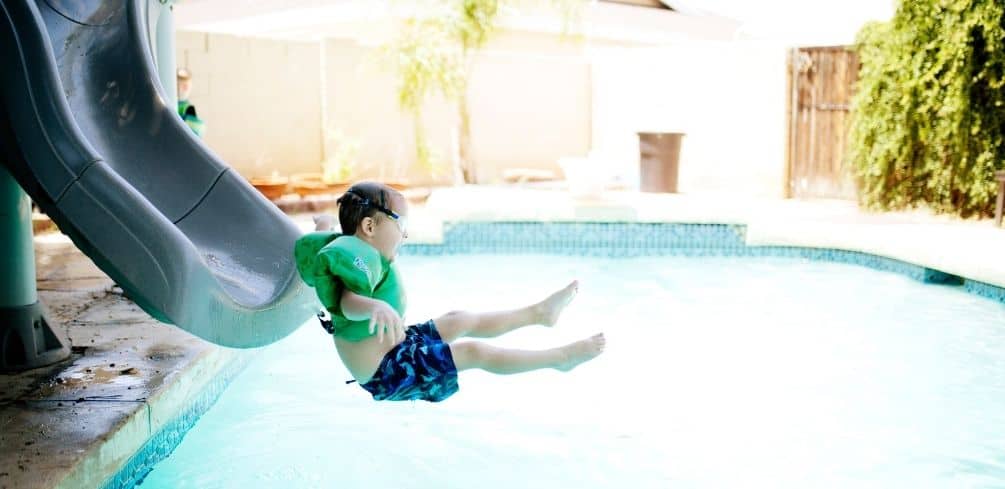
If you are looking for an easy way to keep your kids entertained this summer, here is a great option! How about a swimming pool slide?
In this post, we will be looking at how to make a DIY pool slide with simple and inexpensive materials. It can be a great activity for building up your kids’ imaginations and creativity while having fun!
What You Need to Make a DIY Pool Slide
You are going to have to buy some items to make your pool slide. In this post, we will be using a playground slide, so you will need the following items:
- A playground straight slide (or zig zag Slide)
- Anchors
- Bolts and screws
- A ladder or lumber for making the ladder
- A staple gun and hammer
- Poolside spray kit
Steps for Making a Pool Slide
Plan ahead
You are going to have to carefully plan your DIY Backyard water slide and the materials you will need to make it. It is important that your slide is well-balanced and can support all those who use it without breaking or cracking under pressure.
Plan on how you will anchor the slide and ladder without puncturing the sides of your swimming pool. You may want to add weights at the bottom of the ladder to stabilize it.
Make sure that you have a flat surface for your slide and the ladder, as having one with bumps will make sliding down more difficult and dangerous.
You also need to plan on how much depth you will need for the slide. The more depth you have, the higher people will go when they are sliding down it.
Construct the slide frame/support
After planning out everything and knowing what goes where you can begin constructing your slide support frame. You will need to put together the frame of the ladder so it is sturdy and safe for everyone who uses it.
If you need a ladder, this is the time to start building it. You will also need to build supports for the edge of the ladder and construct the platform for the playground slide.
You can use lumber to build a wide ladder, or if you need it sturdier, you will have to nail two pieces of wood together for each rung and secure them with screws.
Move your support to the edge of the pool
You want to have some space between the edge of the support frame and the edge of the swimming pool because you need to be able to attach the slide and platform. You will also want some space for people to easily get in and out of the swimming pool while using your slide without falling off too quickly.
Attach support frame and slide together
Once everything is ready, it is time to put all the pieces together! This part should not be too difficult, but it will be time-consuming.
Attach the support frame to the pool with screws and anchors so that it is firmly in place and does not shift or move around when sliding down.
You can now attach your slide onto the support frame as well as attach any additional pieces such as a ladder for easier access into and out of the pool. Some slides have prefab holes; it will be easier to secure them with screws.
Check to confirm the slide is positioned securely
Here, you want to double-check to make sure that the slide is attached firmly to the pool and does not shift or move around when sliding down.
You can do this by testing it out with your own body weight on top of it; if you feel like there are some weak spots, go back and reinforce them before moving on to attaching safety bars.
Secure the slide
This is where you plant the support securely in place. You may want to bolt the support down, add weights to the bottom of the slide, or screw it into place.
Be sure to use the right tools for securing it down.
You need to make sure that you can attach a safety bar onto your slide too. This is important because people will be holding on tightly while they are sliding, so having something sturdy and safe for them to hold onto will make everyone feel more secure about using your pool slide.
Test to check if you need more support
You may want to try shaking the slide or lift up on it to see if you have built a sturdy enough pool slide. If there is no movement, then your water slide should be ready for use.
If there are parts that seem weak, you will need to go back and reinforce or rebuild them until they are sturdy enough for people to use.
Spray the pool slide
This is where you will use your poolside spray kit to paint the slide a customize color of your choice. You can choose to do it before or after you have built and secured your water slide, so that is up to personal preference on when best to do this step.
Add grip tape for safety
Grip tape is important because people will be sliding down the pool with speed, which makes it easy to slip off. Add grip tape on the edges of your slide if you feel like it needs more traction, especially for small children who are less experienced at sliding down into a pool.
Test your water slide again and have fun
Test to make sure everything is working properly. If there are any issues, go back to the beginning of this step and test it again until you have maximum safety with your pool slide so that your whole family can enjoy it.
Why You Should Consider a DIY Backyard Water Slide
You don’t need a lot of materials
The materials you need for building a water slide are not expensive, and you can normally find them at your neighborhood hardware store.
You don’t need to hire anyone else
This is the main reason why many people consider DIYing their own pool slides with lumber or prefabricated parts that they buy because it saves time and money on hiring someone else to do the job.
Simple to make
For people who are not very familiar with using tools or lumber, building a pool slide is simple and straightforward. You can use the directions in this article as your guide if you need some help along the way.
There are no complicated steps involved; just prepare yourself for doing an hour or two of work.
It will be more fun to make your own pool slide
It is more fun and rewarding if you build the slide yourself instead of hiring someone else. You can get creative with different designs or materials that are unique; plus, it gives you something positive to do over the weekend when everyone else will be at the local water park.
Inexpensive
Building your own pool slide is not expensive when you compare it to hiring someone else.
Safety Tips for a DIY Pool Slide
When making a pool slide, you are essentially putting people’s lives in your hands. That is why it makes sense to do some safety checks before allowing others to use the slide for entertainment purposes, especially if there will be children playing on it.
Here are a few things that can help keep everyone safe when using pool slides:
Make sure all connections and support beams are secure
Because there will be a lot of speed involved with sliding down the pool, it is important that all connections are strong enough to handle the weight and force from people going down at high speeds.
If you have any doubts about its strength or stability, go back to your design plans and add in some more support beams until it can adequately support the weight of people.
Be sure to understand your pool slide design plans
There are many different designs when it comes to making slides for pools, so if you don’t completely understand what needs to be done or how all of its parts work together in order for everyone’s safety, then hire someone who does know how this is supposed to go down.
Don’t forget to put on your safety equipment
No one will be able to use the pool slide if they are not wearing any protective gear, which means that you should consider putting on gloves and a life jacket in case there is an accident.
If everyone understands what types of safety precautions need to be taken when using the pool slide, then there will be less of a chance for something bad to happen.
Don’t forget about the safety barriers
Even though you are building your pool slide so that it is above ground, this does not mean that people should treat it as if they can run around or do anything without thinking first.
The sides of the slide need to be enclosed by some type of barrier that will prevent people from running into it or falling off the slide.
Know the swimming pool type
If you have a ground pool this is great as it should be easier with a ground pool. If however; you have a backyard above ground pool then it’s best to mount a homemade water slide like this on the wood deck.
Make sure it has plenty of support so it won’t be knocked off easily. Measure carefully and secure it tightly.
Make your homemade water slide slippery safely
If you have a garden hose that can reach the top of the slide you can run water down it. This will make a waterslide nice and slick so people can really glide.
Use caution when doing this to not install the hose where it can cause problems for anyone or get anyone caught. If this is a permanent fixture you can also add plumbing to have the water constantly flow down the slide.
Most backyard pools with water slides like this take the fun to the next level.
Final Thoughts
A DIY backyard water slide is a great way to get more enjoyment out of your swimming pool, and it is simple enough for everyone in the family to use.
Water slides you create on your own save money on hiring someone else, plus you complete the project faster with less hassle. Now it’s time to learn more, read on how to make slides slippery!
Please be careful and use at your own risk
None of the authors, contributors, administrators, or anyone else connected with BestPlaygroundSets, in any way whatsoever, can be responsible for your use of the information contained in or linked from these web pages.


