To build your own batting cage:
- Prepare the ground: Ensure the area is clear of any obstructions or vegetation
- Take measurements: This depends on how big you want it to be
- Place stakes and dig holes for your wooden posts
- Concrete and post installation: You want to secure the posts at this point
- Attach cables and install your net
Having your own batting cage in your own backyard can actually be quite helpful since it allows your baseball or softball players to practice baseball drills over and over without having to spend money at a field.
You and your family, even friends, can do baseball training in your own backyard if you create your own net just for baseball hitting.
In this guide, we are going to show you how to build a batting cage out of wood in seven easy steps.
Why Build Your Own Batting Cage?
- It is easy and doesn’t take a lot of time
Building a batting cage from wood can be done within a day if you have all the supplies and some help from a family member. With a batting cage net, wooden posts, and crossbars, you can build your own batting cage in your backyard where you can have unlimited practice and training hours.
Even though building a batting cage from wood might be a bit costly if you have to buy all the material, it is a genuinely worthwhile project that you should consider if you are a fanatic of baseball or softball.
- Renting is more costly in the long run
On average, renting a batting cage for 60 minutes can cost up to $60. And that doesn’t even consider the time spent loading the car and driving to and from the facilities.
Not as easy to do on a busy weeknight after dinner as, say, just wandering out to the backyard.
If you want to build a batting cage from wood, be prepared to spend well a little over $400. It might sound like a lot, but trust me, it is definitely worth it in the end.
What Kind Of Space Do You Require For A Batting Cage?
The amount of space you require for your batting cage is totally up to you. The only thing we can suggest is that you go with a more rectangular form.
The cage will have a rectangular form for this project.
One side is long, while the other is short. Although this is not always the case, your yard may have enough space for a square or triangular structure.
It is for practice purposes only. Thus any form will suffice.
All you need to know is that you’ll have a well-measured cage at the end of the process that will be of great service.
What You Need To Build A DIY Batting Cage From Wood
- 8 Wood posts measuring at least 12 ft tall
- Auger or a Crowbar
- Batting Net
- Cable clamp set
- Concrete
- Extra-long measuring tape
- Eye hooks
- Mallet for pounding the stakes
- Scrap wood, hammer, nails for supporting poles
- Stainless steel eye to eye turnbuckle
- Steel cable
- Twine/string to tie off
- Two ladders
- Wheelbarrow and hose for pouring concrete
- Wooden stakes around 16
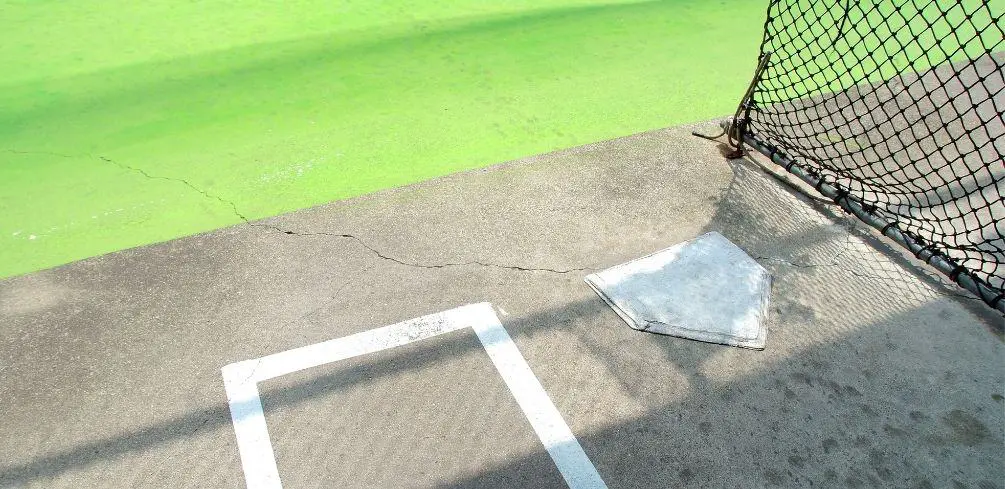
- Home Plate
What Is The Best Place To Get Good Batting Nets?
When it comes to starting your internet surfing trip, Amazon is an excellent place to start. Everything is dependent on your priorities and financial resources.
Alternatively, you may purchase pre-owned nets, which are often at a lower price.
All that is required is that you look. Once you begin looking for nets for your homemade batting cage made of wood, you will come across a variety of options.
There is a good chance that you will find numerous different size selections.
If you want to purchase the finest range of nets at the best costs, read reviews first and make your decision carefully.
You can choose whatever size you like; the conventional size is 12 x 12 by 14; however, you are not restricted to that size or any other size. You are the boss, and you are the only one who understands what will work best for you.
Ubuy and Net World Sports are two other shops that come highly recommended in addition to Amazon, where you may get decent nets. These websites provide an astonishing assortment of supplies for constructing a handmade batting cage out of wooden beams.
If the things you want are in stock, shopping on Ubuy and Net World Sports may be a very convenient experience.
How To Build A Batting Cage From Wood
Step 1: Ground Preparation
Make sure the area where you intend to build your structure is clear of any obstructions or vegetation. For the ground of the cage, grass or turf are the two options available to you.
Before or after building, you can grow grass if you haven’t already. Ultimately, it’s up to you. Alternatively, you may like to utilize a lawn.
To guarantee that you’re excavating safely, you must call your local electric provider to identify where electrical wires cross your land.
Step 2: Take Measurements
Take measurements on the prepared ground that correspond to the size of your batting nets.
While you’re measuring, insert a stake at each corner of the cage’s outline to mark its location. Make certain that the wooden stakes are positioned inside the net.
With the assistance of a second person, take the tape measure and measure the ground surface. While the tape measure is still in position, take a rope and mark the side off with either spray paint or used automotive oil, depending on your preference.
Repeat the process on each of the four sides. Check to see that the sides are parallel.
According to your net’s measurements, the cage will be 40 feet long by 14 feet wide by 12 inches high. This implies that the cage’s length will be 40 feet, its width will be 14 feet, and its height will be 12 feet.
Some people may misinterpret the readings and mistakenly measure the height for the width, resulting in them having to start again. That is something to be cautious about.
Place a wooden stake in each of the four corners. Begin with the section that is the longest.
Take, for example, a 40-foot-long batting cage net. Measure the length of the net and set your first two stakes 40 feet apart to denote the beginning and end of the batting cage.
Measure the width of one of the stakes and plant a stake, then measure another 40 feet from that point (or any other length depending on your batting net). To finish the cage outline, place another stake and measure across to the opposite side.
As a precautionary step and for the sake of symmetry, double-check that all of the opposing sides are the same length. That is to say, the widths and lengths should be equal, as should the heights.
TIP: Measure diagonally across the length of your rectangle to check that the measurements are the same on both sides. The finished result should be a long rectangle with stakes in each of its four corners, as shown in the picture.
If the distance between your upper left corner and the bottom right corner is more than the length of time that separates the distance between your top right corner and bottom left corner, you know you’re not square, and you need to change your stakes appropriately.
The net will be properly positioned if all four corners are adequately positioned.
Step 3: Place Small Stakes
Once the arrangement has been decided upon, it is time to layout your other stakes to indicate where the other posts will be placed. You will be adding two posts on the insides of each side of the house in this project (so four posts total on each side).
Make a mark on the ground where the 2nd and 3rd posts in each row will go, and then insert the posts into the ground.
Using thick, heavy-duty twine, tie the string around each stake, linking them one to the next to guarantee they don’t move once they’re all in position. This also aids in the preservation of the square while the stakes are being driven.
Make circles around stakes using orange marking spray paint so that there is a clear indication of where the hole should be bored before drilling it. If you have a powerful hitter, getting the stakes in the ground as quickly as possible is critical.
Step 4: Dig Holes For The Wood Posts
You should use the drill to dig out all eight holes. Prepare and moisten the hole. You must first excavate and prepare the hole before you can start working.
The holes should have a diameter twice as large as the post and a depth one-third as deep as the post. After that, fully moisten the hole, taking care to avoid “pooling” of water at the bottom.
Step 5: Concrete and Post Installation
Before inserting the post, pour 100mm of Rapid Set Concrete into the bottom of the hole. Toss the post into the hole and tighten it.
If necessary, reinforce posts in place with clamps and lumber, making sure they are all level before moving on. Alternatively, the post might be held in place by another individual.
Continue to use a plumb line or level to ensure that the post is straight and level.
Add roughly 2.5 liters of water to the contents of one 20kg bag at a moderate and steady pace on a mixing board or wheelbarrow. The optimum mixture is one that is firm and drier.
Into the hole, pour the mixture in.
Fill up the hole surrounding the post with the moist mixture you just made. Tamp the mixture to ensure that the concrete is properly solidified.
Environmental conditions that are warm and/or humid will shorten the functioning duration of this product. Keep the material cool and use cold or cooled water for mixing if the weather is particularly hot and humid.
Allow for the drying of the concrete from here on out. Give yourself three hours, and during that time, you may clear away the dirt that has accumulated on both sides of the holes.
Step 6: Attach The Cables
Wire ropes will be attached to the poles using eye bolts, a straining screw eye, and a hook, as well as steel grips to keep them in place.
An eye loop on the wire rope should be connected to an eyebolt fastened to one of the posts. Install a screwing eye and hook at the end of the wire and run it down the length of the wire to the post across it.
Cut the wire rope at that point, bearing in mind that you will need to have enough length to attach an eye loop and a steel grip later on. After that, loosen the screw and eye hook as far as possible before attaching the wire rope and tightening it.
Repeat the technique for each of the eight posts to ensure that the wire rope is securely fastened.
After stringing the steel wire down to the median length of the batting cage and connecting it to the header cable on both ends, secure the header cable with wire grips to prevent it from slipping.
Step 7: Connecting the Net
Connect the net to each post by tying the ends of the ropes together. You should use carabiners to secure the net to the wires every 4 feet or so. Just make sure you don’t extend the net too much.
You should use tent stakes to secure the net to the ground.
To mow your lawn, you may remove the tent posts and slide the net to one side with the aid of carabiners linked to the wire rope tied to the tent stakes.
A batting cage that is ready to be used in your backyard, at long last. Feel free to throw home plate down and swing for the stars.
Your complete gear and travel expenditures for hitting practice sessions might be saved, which could save you hundreds of dollars.
Final Remarks
Making a batting cage from wood by yourself is a long process, but it is worth trying. You do not need stellar masonry or carpentry skills to build a batting cage in your backyard.
All you need is the knowledge, and a little help from family members and you are good to go.
There are other things I did not mention, such as a pitching machine. You can choose to install one for your batting cage to add more fun to it.
In general, even if you bought everything for this project, building a DIY batting cage from wood is cheaper and more convenient than buying or renting one.
Baseball is not your sport? Try building a backyard basketball court!
Please be careful and use at your own risk
None of the authors, contributors, administrators, or anyone else connected with BestPlaygroundSets, in any way whatsoever, can be responsible for your use of the information contained in or linked from these web pages.


