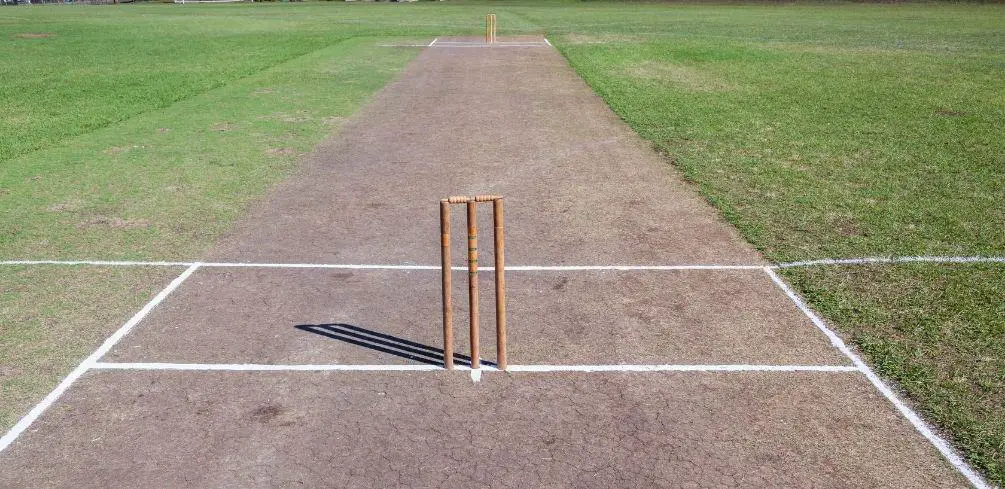
6 Steps to create a Backyard Cricket Pitch:
- Identify your location
- Mow the area and remove any dirt and debris
- Choose your pitch size. This depends on your backyard size
- Level up the pitch
- Measure your pitch and mark your boundaries and end zones
- Mark the bowling and batting crease
Cricket is a popular sport around the world that uses a tennis ball, but it’s not always easy to find a place to play. If you want your kids or yourself to practice their batting skills, then why not make your own cricket pitch and enjoy it on some hot days?
In this blog post, we will show you how to do just that.
Why Make Your Own Backyard Cricket Pitch?
It is easy to make
Making a backyard pitch doesn’t require professional skills or expensive equipment. All you need are some basic tools, a few supplies, and about 6 hours of free time on your hands to get started.
Backyard pitches are customizable for different skill levels
There are several things that you can do with the pitch once it’s made in order for everyone in the family to have fun while practicing their batting skills. You can customize the pitch to have different dimensions depending on your skill level, or you can make it more challenging by adding hard boundaries like concrete walls and fences.
You do not need a lot of space
A perfect backyard cricket pitch is a backyard cricket. It doesn’t need to be too big or extensive just enough adequate room. You can even make the pitch area on a small yard, patio, or driveway if you don’t want to deal with all the grass getting cut, leveled, and maintained all the time.
It is low-maintenance
Cricket pitches are not like football fields that need to be mowed once in a while or soccer courts that require regular maintenance due to weather. All you need to do is make sure that it’s flat, leveled, and free of debris.
Then check on it every couple of weeks or months if there are any major changes in the weather conditions where you live.
It builds teamwork skills amongst family members
Cricket requires good communication between all team members while practicing batting techniques like running, throwing, and catching. This is also a good way to bond with your kids or spouse while enjoying the game that you love.
What You Need to Make a Backyard Cricket Pitch
You will need the following items to get started:
- A lawnmower
- Grass-friendly paint for marking
- A garbage bin
- Strings for marking outlines for a good cut
- A measuring a tape
- Cricket Equipment
Steps for Making a Backyard Cricket
Step 1: Identify your location
Location is very important when making a backyard pitch. It needs to be flat, level, and free of any obstacles like rocks or debris. You can check the ground in your backyard with a metal detector to make sure that the area is safe for a cricket pitch.
Step 2: Mow the area and remove any dirt and debris
You want to get rid of all the tall grass and rocks. So be sure to carefully mow the area. Remove any dirt and debris to make sure that the pitch is flat and sturdy.
Step 3: Choose your pitch size
The size of your pitch will obviously depend on the size of your lawn. But you can go bigger if you need more space and have a large backyard.
The 20-yard pitch in cricket is often recommended for a beginner, but it’s up to you and your family to decide the best size.
Step 4: Level up the pitch
You want to make sure the ground is perfectly level. So check for any bumps or elevated areas and level them up by adding soil or sand.
This will ensure that the ball bounces evenly across any area of your pitch.
Step 5: Measure your pitch and mark your boundaries and end zones
This is where you want to be very careful. To mark the pitch for a fine cut, you can use strings and chalk.
You need to measure the width and length of your pitch. Then use a measuring tape or string to mark where you want the boundaries.
The boundaries will be marked with grass-friendly paint so that they don’t get damaged when the ball hits them. The most important part is to lay down electrical tape and then paint over them to make sure the grass areas are marked properly.
Step 6: Mark the bowling and batting crease
Again, you will need to use your grass-friendly paint for this step. You can mark the bowling crease on your pitch so that both teams know where to stand.
Then you will want to make another line for the batting crease. You can also add netting behind the playing area of where the batsman stands this will help prevent losing balls and running after them.
That’s it! With these steps and the right tools, your cricket pitch should be ready for a backyard cricket match.
Backyard Cricket Pitch FAQs
Is it hard to make a backyard cricket pitch?
No. A DIY backyard pitch is a piece of cake and has the same basic principles as a match pitch. You don’t need to be an engineer or have any previous experience in making one.
There are even free tutorials online that you can refer to if you’re feeling unsure about your skills as a DIY-er for this project.
How long does it take to make a backyard cricket pitch?
It will depend on how large your pitch is. It shouldn’t take more than a weekend to make your perfect backyard cricket pitch if you’re doing everything by yourself.
Isn’t it expensive to build a DIY backyard cricket pitch?
Not at all. You will only need the items on the list above and some time on your hands.
How often should you mow the grass on your DIY cricket pitch?
You want to make sure that your lawn gets enough sunlight to keep the grass healthy and doesn’t get too long, either. So mowing regularly every week or two to maintain its optimal conditions.
This will keep a healthy covering of grass, also make sure to use a good sturdy garden hose to wet it when needed. This job helps keep the grass healthy but make sure the soil dries before using it.
What do I need to make a backyard cricket pitch?
Some f the items you need are probably already in your home. You will need a lawnmower, grass-friendly paint for marking your pitch boundaries and end zones, a garbage bin for rubbish collection, string to mark out an even cut on your perfect backyard cricket pitch.
A measuring tape/string is also necessary if you want accurate measurements when marking the bowling crease and batting line.
Final Thoughts
Making a perfect cricket pitch is an easy DIY project that you can do on the weekend. You don’t need any prior experience or special skills to build one.
And the best part is, you don’t need to spend a lot of money. So get your DIY tools and start building one for you or your family.
Please be careful and use at your own risk
None of the authors, contributors, administrators, or anyone else connected with BestPlaygroundSets, in any way whatsoever, can be responsible for your use of the information contained in or linked from these web pages.


